My server is not getting back!
Wait at least 5 to 10 minutes, since the operating system on the Server might still be automatically checking the hard disk for errors.
This is a normal procedure, carried on a regular basis.
Still not responding?
Check for possible hardware problems:
go to your Control Panel and enter the Recovery Mode; this way, the server will boot from an alternative live cd Linux distribution (this means you will be able to access the server only via a Terminal in SSH mode).
User and password will the be displayed in your Control Panel.
Please note: Recovery Mode is an advanced modality and it is advisable to perform the following operations only if you have adequate technical skills.
Once the server booted in Recovery mode, run a check for hard disk errors.
To check your disk for errors and eventually try to repair them automatically, you will need to connect to your server using an SSH connection and in the Terminal type the following:
fsck.ext3 -pvf /dev/sdXY
Please note: (X and Y identify your hard disk)
Answer "yes" to all questions the server will present after typing:
fsck.ext3 -yvf /dev/sdXY
Also check for bad blocks (Bad Sectors) typing the following:
fsck.ext3 -c /dev/sdXY
If bad sectors are found on the disk, please open a support request from the Control Panel and our team will change your disk with a new one.
Please be aware that the new disk will be completely empty!
If you need to perform a last-minute backup, this is the right time to do it!
Perform a disk backup
If you have an up-to-date Plesk backup, use the Plesk Backup Manager tool to restore it.
This is an easy procedure, see how to do it in the step Plesk Backup Manager at the end of the tutorial.
If you need a last-minute backup, you will need to perform it manually; to do so, follow the procedure described below.
If you use Plesk, your domain hosting contents are located on /var/www/vhosts
If you're not using Plesk, please check the manual of the panel you are using (if any).
To perform a backup of domain contents from the command line, type in the Terminal:
cd /var/www
tar zcvf hostsbackupfilename.tar.gz vhosts
Your databases are located at /var/lib/mysql
cd /var/lib
tar zcvf dbbackupfilename.tar.gz mysql
Now that your contents and databases have been backupped, download them on your PC using a Secure FTP software such as Cyberduck (for Mac) or WinSCP (for Windows).
Once your files have been saved locally, perform an OS reinstall on your Server from your Control Panel.
After that, perform a Restore of your previously saved backups.
Restore
To restore your domains from the manual backup you have performed, you will first need to recreate those domains in the fresh Plesk install, preferably using the same FTP username.
Recreate also your databases and, if possible, use the same usernames you had previously used for each of them.
Don't worry if you don't remember FTP or databases usernames, the operation can be performed anyway.
After recreating domains and databases, restore your contents by uploading the backup files to your server (using again WinSCP or Cyberduck) to your temp folder, called /tmp
After having uploaded the backup files and just to make sure everything gets restored correctly, rename the vhosts folder from the command line, typing in the Terminal:
cd /var
mv vhosts vhostsbck
Now you can uncompress the backup:
cd /tmp
tar zxvf hostsbackupfilename.tar.gz
This will create a vhosts folder in /tmp; now move the vhosts folder to /var/www/ typing in the command line:
mv vhosts /var/www
Uncompress the databases backup by typing:
tar zxvf
dbbackupfilename.tar.gz
You have now a mysql folder; list its contents:
ls -la
Here you will recognise your database looking by its name as in the example below (we called it Mydb1 for your convenience):
drwx------ 2 mysql mysql 4096 Apr 18 15:27 apsc
-rw-r--r-- 1 root root 0 Apr 18 15:19 debian-5.5.flag
-rw-rw---- 1 mysql mysql 5242880 May 6 06:30 ib_logfile0
-rw-rw---- 1 mysql mysql 5242880 Apr 18 15:19 ib_logfile1
-rw-rw---- 1 mysql mysql 27262976 May 6 06:30 ibdata1
drwx------ 2 mysql mysql 4096 Apr 23 15:21 Mydb1
drwx------ 2 mysql root 4096 Apr 18 15:20 mysql
-rw-rw---- 1 root root 6 Apr 18 15:20 mysql_upgrade_info
drwx------ 2 mysql mysql 4096 Apr 18 15:19 performance_schema
drwx------ 2 mysql mysql 4096 Apr 18 15:27 phpmyadmin_eiugytPXimdd
drwx------ 2 mysql mysql 12288 Apr 24 09:48 psa
drwx------ 2 mysql mysql 4096 Apr 18 15:26 sitebuilder5
Now copy Mydb1 to /var/lib/mysql by typing:
cp Mydb1 /var/lib/mysql
You will be asked to confirm that you want to replace the existing file; type "Yes".
Now set up the right permissions for the restored database:
chown -R mysql:mysql /var/lib/mysql/Mydb1
Your database should now be restored
Check your domains and if you get error 403, update the domain folder permissions - for example in the domain mydomainrestored1.com you will need to know the FTP user you created before (example: ftpuser1).
Type then:
chown -R ftpuser1:psacln /var/www/mydomainrestored1.com/httpdocs
chown ftpuser1:psaserv /var/www/mydomainrestored1.com/httpdocs
If after all of the above your problem persists, please file a support request from your Control Panel and our team will look into your server to find a solution.
Plesk Backup Manager
If you have an up-to-date Plesk backup or if you save your Plesk backups to an external FTP repository, use the Plesk Backup Manager tool to restore it and after a server reinstall follow the procedure described at http://download1.parallels.com/Plesk/PP11/11.0/Doc/en-US/online/plesk-administrator-guide/59263.htm
My server is not getting back!
Wait at least 5 to 10 minutes, since the Operating System on the Server might still be automatically checking the hard disk for errors.
This is a normal procedure, carried on a regular basis.
Still not responding?
Check for possible hardware problems:
go to your Control Panel and enter the Recovery Mode; this way, the server will boot from an alternative live cd Linux distribution (this means you will be able to access the server only via a Terminal in SSH mode).
User and password will the be displayed in your Control Panel.
Please note: Recovery Mode is an advanced modality and it is advisable to perform the following operations only if you have adequate technical skills.
Once the server booted in Recovery mode, run a check for hard disk errors.
To check your disk for errors and eventually try to repair them automatically, you will need to start by installing the ntfs package, type the following in the Terminal:
apt-get install ntfstprogs
Now force Windows to check the disk for file system errors and try to repair it automatically typing in command line:
ntfsfix /dev/sdXY
As soon as the operation it completed you may restart your server; to do so, type in the Terminal:
shutdown -r now
A little longer waiting than usual will be required for startup, while Windows check disk will perform the requested verification (bigger disks require more time).
Perform a disk backup
If you are using the Plesk Panel, your domain hosting contents are normally located at C:\inetpub\vhosts\
If you're not using Plesk, please check the manual of the panel you are using (if any).
Now perform a backup of domain contents and create a zipped file of the vhosts folder.
To do so, first, mount the disk in your recovery mode by typing in the Terminal:
#mount -t ntfs-3g /dev/sdXY/ /[mountpoint]/
If you got an error, you need to install ntfs tools; type:
# apt-get install fuse fuse-ntfs-3g
Then, repeat:
#mount -t ntfs-3g /dev/sdXY/ /[mountpoint]/
[mountpoint] will be used in next commands so, you can use, for example: mnt
mnt is a default mount point.
Now type in the Terminal:
cd /[mountpoint]/inetpub/
tar zcvf vhostsbckup.tar.gz vhosts
Databases are located at
C:\Program Files (x86)\Parallels\Plesk\Databases\MySQL\data
Now type in the Terminal:
cd /[mountpoint]/Program\ Files\ (x86)/Parallels/Plesk/Databases/MySQL/
tar zcvf databases.tar.gz data
Now that your contents and databases have been saved, store the zipped files on your PC hard drive using a Secure FTP software such as Cyberduck (for Mac) or WinSCP (for Windows).
Once these files are saved, you can proceed reinstalling the operating system from your Control Panel.
Windows restore
To restore your domains from the manual backup you just created, you will first need to recreate those domains in the fresh Plesk install, preferably using the same FTP username.
Then recreate the databases, again using the same usernames you had previously used for each one of them.
Don't worry if you don't remember FTP or databases usernames, the operation can be performed anyway.
After recreating domains and databases, restore your contents by uploading the backup files to your server (using again WinSCP or Cyberduck): upload the backup files to your to your server Desktop and decompress them.
To uncompress a tar.gz file, you can use 7ZIP or Winrar.
After decompressing the vhostsbckup.tar.gz backup, navigate in file explorer to C:\inetpub\vhostsNow copy the domains from the vhosts folder of your backup and paste it in C:\inetpub\vhosts\
WARNING: copy ONLY the domain names folder. Do NOT copy all vhosts folder.
Now uncompress the databases.tar.gz backup. You will be able to recognise your dbs looking at their names.
You have a DB called Mydb1 so copy it and paste it in:
C:\Program Files (x86)\Parallels\Plesk\Databases\MySQL\data
WARNING: copy ONLY the database folder (Mydb1)! Do NOT copy all folders.
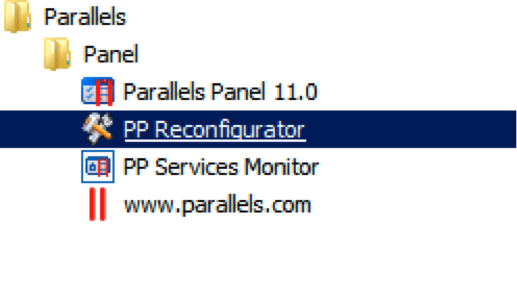
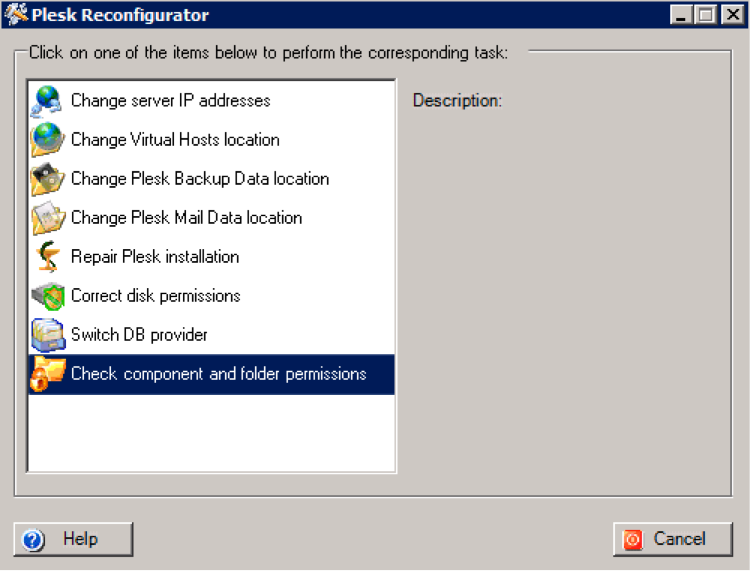
If you get any kind of permission errors, use Plesk Reconfigurator and follow the images below: